
Skipping steps in your FBA shipment process is expensive. Solo sellers managing 20 to 200 SKUs lose between $30,000 and $45,000 annually from stockouts caused by poor shipment preparation. That is not a rounding error. It is a business problem. This fba shipment checklist step by step guide walks you through every stage, from account setup to inventory availability, so you stop losing money to avoidable mistakes. Whether you are shipping your first pallet or your fiftieth, following a structured process is what separates sellers who scale from sellers who stall.
Table of Contents
- Key takeaways
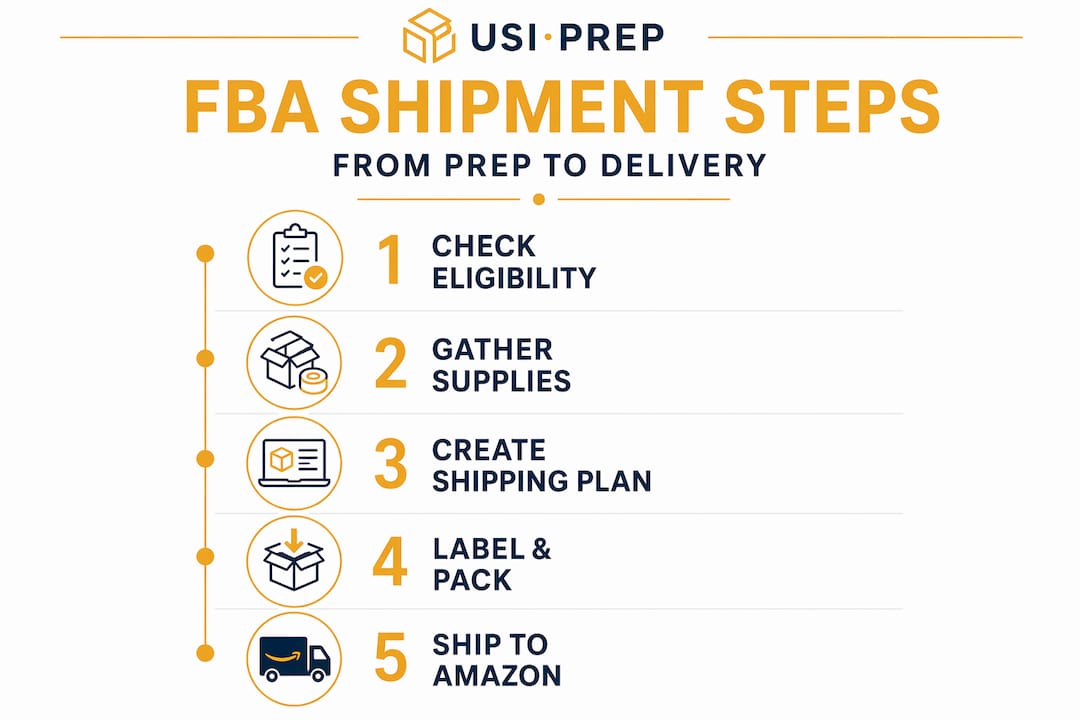
- The FBA shipment checklist step by step starts here
- Creating your FBA shipping plan in Seller Central
- Prepping, labeling, and packing your products
- Choosing your shipping method and carrier
- Tracking your shipment through to inventory availability
- What I have learned from watching sellers get this wrong
- Let Usiprep handle the hard part
- FAQ
Key takeaways
| Point | Details |
|---|---|
| Prep before you ship | Gather all materials and verify product eligibility before touching Seller Central. |
| Case-packed wins | Case-packed shipments check in faster and generate fewer warehouse discrepancies. |
| Label accuracy matters | Incorrect FNSKU labels trigger inbound defect fees of $1 to $3 per unit. |
| Use partnered carriers | Amazon partnered carriers offer rates up to 50% below retail for FBA shipments. |
| Track after dispatch | Monitor shipment status in Seller Central from shipped through receiving to catch delays early. |
The FBA shipment checklist step by step starts here
Before you create a single shipping plan, you need the right foundation. Skipping this phase is where most small sellers run into trouble. Showing up to Seller Central without your materials, identifiers, or account settings in order wastes time and creates errors that compound downstream.
Account and product eligibility
Your Seller Central account must be active and in good standing. You need a Professional selling plan to access FBA. Check that each product you intend to send is FBA-eligible. Some categories, including hazardous materials and certain food items, require additional approval or are restricted entirely.
Every unit you send to Amazon needs a scannable product identifier. Amazon uses the FNSKU (Fulfillment Network Stock Keeping Unit), which is specific to your seller account and ties inventory to you. Do not confuse it with the manufacturer barcode. If you ship with the manufacturer barcode and another seller uses the same barcode, your inventory can get commingled, which creates returns and negative reviews that are not your fault.
Tools and supplies you need on hand
Running out of poly bags mid-pack is a workflow killer. Before you start, confirm you have:
- A label printer (thermal printers like the Zebra ZP450 are standard)
- FNSKU labels printed and ready
- Poly bags with suffocation warnings for items with openings over 5 inches
- Bubble wrap or foam for fragile items
- Packing tape and a tape gun
- Box cutters and void fill material
- A scale accurate to at least 0.1 pounds
Pro Tip: Print 10% more FNSKU labels than your unit count. Smudged or misaligned labels happen, and reprinting mid-session breaks your rhythm.
Amazon requires poly bags with suffocation warnings for any opening exceeding 5 inches, and fragile or multipack items have their own specific prep standards. Getting this wrong before you even pack a box means fees and rejections at the warehouse.
Creating your FBA shipping plan in Seller Central
This is where the step by step FBA process gets real. The shipping plan locks in your quantities, destinations, and box configurations. Errors here are costly. Changing quantities after plan approval can trigger unexpected fees and delays, so get it right before you submit.
Here is how to move through the Send to Amazon workflow:
- Log into Seller Central and go to Inventory, then Manage FBA Inventory.
- Select your products by checking the box next to each ASIN you are shipping. Click “Send/Replenish Inventory.”
- Choose your packing type. You will select either case-packed units (all units in a box are identical) or individual units (mixed SKUs in a box). Case-packed is strongly preferred. It speeds up warehouse receiving and reduces discrepancies.
- Enter your quantities carefully. Use a reorder point formula based on daily sales velocity, supplier lead time, and safety stock to determine how many units to send. Systematic reorder point tracking is what separates sellers who run out of stock from those who do not.
- Select your fulfillment center destination. Amazon may split your shipment across multiple warehouses. You can pay to consolidate to a single destination, which simplifies logistics but costs more.
- Review your shipment summary. Confirm shipment IDs, box counts, and weight estimates before proceeding.
Pro Tip: Screenshot your shipping plan summary before approving it. If Amazon’s system shows a discrepancy later, you will have a timestamped record of what you submitted.
The Send to Amazon workflow is both a logistical and financial decision. Every quantity you enter has a cost attached to it, whether that is storage fees, shipping costs, or the opportunity cost of a stockout.
Prepping, labeling, and packing your products
This is the most labor-intensive part of the FBA packing checklist, and it is where inbound defects originate. Failure to apply correct prep and labeling leads to fees of $1 to $3 per unit and check-in delays that can push your inventory availability back by days or weeks.
Labeling your units
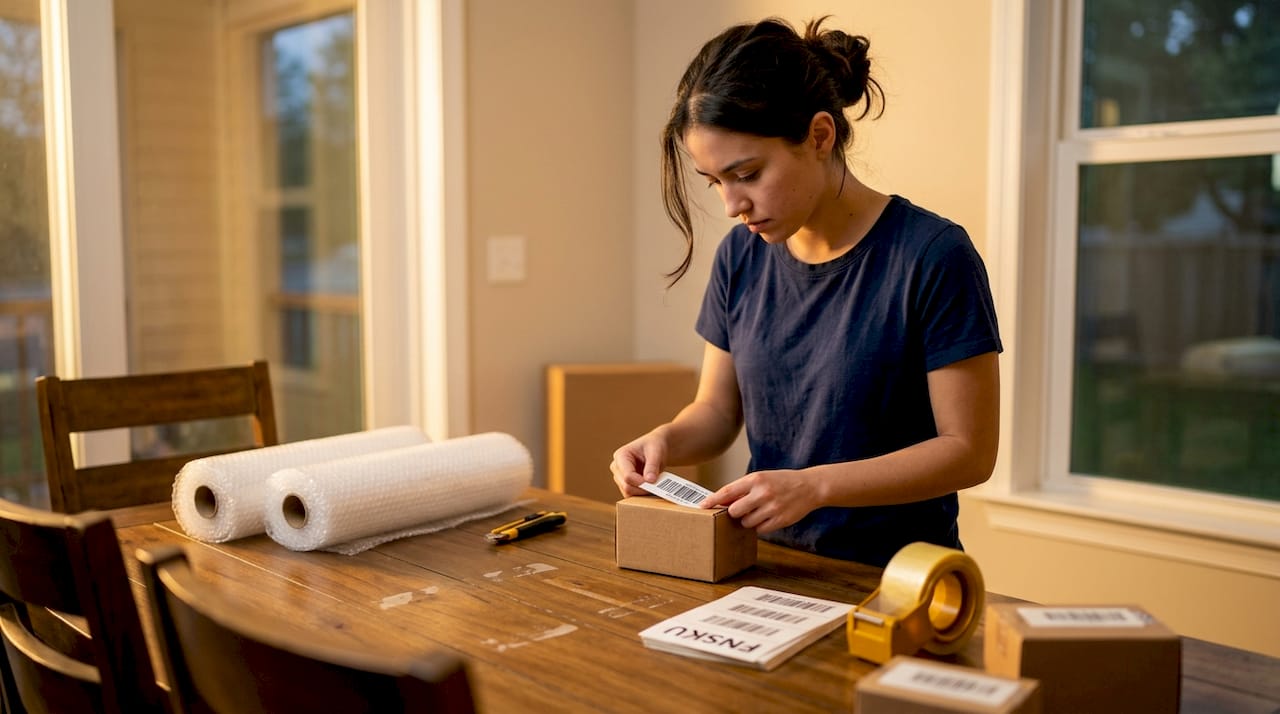
Apply FNSKU labels directly over the manufacturer barcode so Amazon’s scanners read only your label. Labels must be flat, fully adhered, and scannable. Do not place them on curved surfaces, seams, or areas that will be covered by packaging.
If you use Amazon’s label service (they apply labels for you at the warehouse), you pay per unit and lose control over placement accuracy. For most small sellers, self-labeling is worth the time.
Product-specific prep requirements
| Product type | Prep requirement |
|---|---|
| Apparel and fabric items | Poly bag with suffocation warning, sealed shut |
| Fragile items (glass, ceramics) | Bubble wrap, drop test compliant |
| Multipacks | Labeled “Set of X, Do Not Separate” |
| Sharp items | Blunt packaging or sheathed |
| Small items (under 2.5 x 2.5 inches) | Poly bag to prevent loss |
Packing your boxes
Each box must contain units from only one shipment ID. Mixing shipment IDs in a single box is one of the most common errors small sellers make, and it creates receiving chaos at the warehouse.
- Keep box weight under 50 pounds (individual units over 50 pounds need a “Team Lift” label)
- Keep box dimensions within Amazon’s limits (no side longer than 25 inches for standard products)
- Use void fill to prevent units from shifting during transit
- Seal all seams with at least two strips of tape
Once your boxes are packed, generate your FBA Box ID labels from Seller Central and apply one to each box on a flat, visible surface. Case-packed shipments receive faster check-in and fewer discrepancies, which is why experienced sellers default to this format whenever possible.
Pro Tip: Pack a printed packing slip inside each box listing the contents and quantities. It is not required, but it helps Amazon’s receiving team verify your shipment quickly and reduces discrepancy claims.
Choosing your shipping method and carrier
Your shipment size and frequency determine which method makes the most sense. Here is a breakdown:
| Shipping method | Best for | Key consideration |
|---|---|---|
| Small Parcel Delivery (SPD) | Under 150 lbs, frequent small shipments | Simple, fast, no appointment needed |
| Less-Than-Truckload (LTL) | 150 to 15,000 lbs, palletized freight | Requires delivery appointment with Amazon |
| Full Truckload (FTL) | Large volume, single destination | Most cost-efficient at scale |
For most small sellers starting out, SPD is the default. It is simple, requires no freight appointment, and integrates cleanly with the Send to Amazon workflow.
The biggest cost lever available to you is Amazon’s partnered carrier program. Partnered carriers offer rates that are often 50% or more below retail pricing for UPS and LTL options. You access these rates directly inside Seller Central when you choose your shipping method.
A few things to confirm before handing off your shipment:
- Enter accurate box weights and dimensions in Seller Central before generating labels
- Schedule carrier pickup if using LTL and confirm your delivery appointment with the fulfillment center
- Enter tracking numbers into Seller Central as soon as you have them
Pro Tip: If you are using LTL, call the fulfillment center 24 hours before your scheduled delivery to confirm the appointment. Missed appointments result in rejection and rescheduling fees from your carrier.
Tracking your shipment through to inventory availability
Once your boxes leave your facility, the work is not done. Monitoring your shipment in Seller Central is part of a complete FBA shipping guide, not an afterthought.
Here is what to do after dispatch:
- Print and apply carrier labels to each box before handoff. Verify every label scans correctly.
- Mark your shipment as shipped in Seller Central under the Shipping Queue. Enter tracking numbers for every box.
- Monitor status updates. Shipments move through these stages: Shipped, In Transit, Delivered, Checked In, Receiving, Closed.
- Watch your timeline. Transit and processing times typically run 3 to 14 business days. During Q4, expect delays on the longer end due to peak volume at fulfillment centers.
- Investigate discrepancies. If your received quantity does not match what you shipped, open a case with Seller Support and reference your shipment ID and packing records.
“Inventory that is in transit is not available inventory. Plan your replenishment cycles so your next shipment arrives before your current stock hits zero.” This is the single most important mindset shift for small sellers managing FBA inventory.
If your shipment shows “Delivered” but has not moved to “Receiving” after five business days, contact Seller Support with your tracking number and shipment ID. Do not wait two weeks hoping it resolves itself.
What I have learned from watching sellers get this wrong
I have worked with dozens of small eCommerce sellers going through the FBA shipment process, and the pattern is always the same. Sellers who struggle are not bad at logistics. They are reactive instead of systematic.
The sellers who run into constant stockouts are the ones relying on gut feel for reorder timing. The ones who get hit with inbound defect fees are the ones who prep in a hurry. And the ones who pay the most for shipping are the ones who never bothered to check whether Amazon’s partnered carrier rates were available to them.
What I have found is that treating the Send to Amazon workflow as a financial decision, not just a logistics task, changes everything. Every box you pack and every quantity you enter has a downstream cost. Overshipping ties up capital in storage fees. Undershipping creates stockouts that cost thousands per quarter in lost revenue.
My advice: build a repeatable prep checklist specific to your product catalog. Not a generic one. Yours. Because your fragile ceramics have different prep requirements than someone else’s apparel. And Amazon FBA’s strict compliance standards mean there is no partial credit for close enough.
The sellers who scale without chaos are the ones who front-load their diligence. They check twice, pack once, and never improvise on labeling.
— Akbar
Let Usiprep handle the hard part
If you are spending hours on prep, labeling, and packing when you should be focused on sourcing and growing your catalog, that is a sign you have outgrown DIY fulfillment. Usiprep was founded by former Amazon sellers who know exactly what Amazon’s receiving teams expect, and they built their prep process around those standards.
Clients working with Usiprep’s FBA prep services see an average 30% reduction in fulfillment costs and benefit from a 98.9% on-time delivery rate. Faster check-ins, accurate labeling, and complete shipment visibility mean fewer defect fees and fewer stockouts. If you want to see what professional prep costs for your shipment volume, check out Usiprep’s pricing and find the right fit for your operation.
FAQ
What is the first step in the FBA shipment checklist?
The first step is verifying product eligibility and gathering all prep materials before opening Seller Central. Starting in the platform without your FNSKU labels, poly bags, and box supplies ready leads to errors and wasted time.
How do I avoid inbound defect fees from Amazon?
Apply FNSKU labels correctly over manufacturer barcodes, use product-specific prep like poly bags and bubble wrap, and never mix shipment IDs in a single box. Inbound defect fees run $1 to $3 per unit and are almost always preventable.
Should I use case-packed or individual units for my FBA shipment?
Case-packed shipments are the better choice for most sellers. Amazon’s receiving teams process them faster and generate fewer discrepancies, which means your inventory becomes available sooner.
How long does it take for FBA inventory to become available after shipping?
Transit and processing typically take 3 to 14 business days. During peak seasons like Q4, delays are common. Monitor your shipment status in Seller Central under the Shipping Queue and contact Seller Support if your shipment stays in “Delivered” status for more than five business days.
Can I change my shipment quantities after approving my FBA shipping plan?
You can make changes, but doing so after approval can trigger unexpected fees and processing delays. Finalize your quantities carefully before submitting your plan to avoid these costs.